Across the United States, window shades work through bright summer sun, changing seasonal temperatures, daily use, and the occasional tug from children or pets. When a shade begins sticking, hanging unevenly, or refusing to stay in place, timely window shade repair can help homeowners protect privacy, light control, and the usable life of an existing treatment.
Conditions vary from humid coastal areas to dry inland climates and cold northern winters, but the basic rule is consistent: a small operating problem deserves attention before it puts more strain on the shade’s cords, brackets, fabric, or internal mechanism. A careful inspection helps separate a simple adjustment from a problem that calls for replacement.
Why Small Shade Problems Deserve Quick Attention
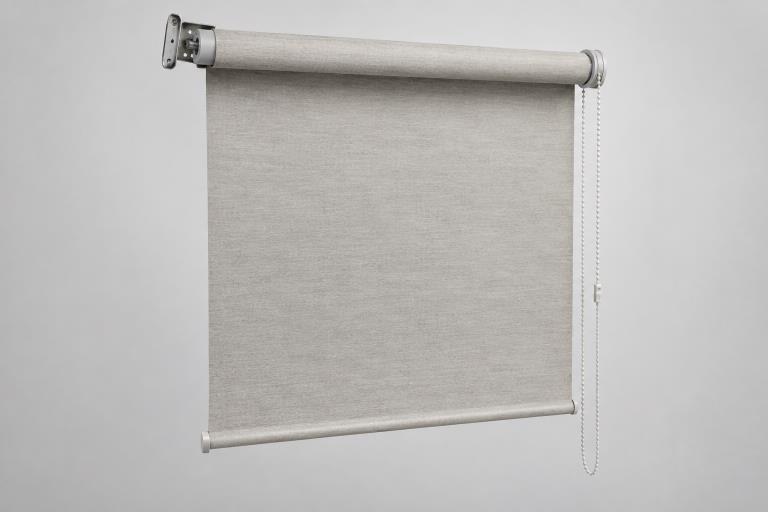
A shade that rolls unevenly, tilts to one side, or catches during operation can place added stress on its mounting points and moving parts. What starts as a roller shade drifting off-center may eventually affect the fabric edge or clutch. Likewise, a cellular shade that will not remain level may have a cord, rail, or internal support issue rather than a visible fabric problem.
Early attention also makes it easier to identify the original cause. A loose bracket can make a shade appear defective, while an obstruction in the window frame may make a healthy shade seem difficult to operate. Checking the treatment before forcing it open or closed can prevent avoidable damage.
Common Signs a Window Shade May Need Repair
Homeowners searching for shade repair near me often notice one or more recurring warning signs before a treatment stops working altogether. These symptoms are worth documenting with photos, particularly if the problem changes over time.
- The shade will not raise or lower smoothly.
- Fabric rolls or gathers toward one side.
- Slats remain crooked after adjustment.
- A cord appears worn, loose, or damaged.
- The shade will not hold its selected height.
- Mounting brackets shift when the treatment is used.
- A motor responds slowly, inconsistently, or not at all.
- Clicking, grinding, snapping, or unusual resistance occurs during operation.
Damaged operating cords deserve special caution. The window covering safety guidance from the U.S. Consumer Product Safety Commission explains why accessible cords can present a hazard for young children. Never knot, cut, loop, or improvise a cord repair without understanding the safety implications.
Repair or Replace? A Simple Decision Guide
Repair is often worth considering when the trouble is isolated, the shade still fits the window properly, and its fabric, slats, or frame remains in sound condition. Replacing a bracket, adjusting a shifted shade, or addressing a single failed component may restore normal function without changing the room’s appearance.
Repair may make sense when:
- Only one identifiable part has failed.
- The material is clean, intact, and appropriate for the room.
- Replacement parts are available and compatible.
- The treatment still delivers suitable privacy and light control.
- The expected repair cost is reasonable compared with replacement.
Replacement may make more sense when:
- Several components are failing at the same time.
- Fabric is badly stained, brittle, torn, or faded.
- Slats, rails, or tracks are warped beyond a stable adjustment.
- Matching parts are unavailable.
- The shade no longer suits the room’s privacy, glare, or insulation needs.
Issues That May Suit a Careful DIY Fix
Low-risk upkeep can help preserve window shades between more involved repairs. Dusting with a microfiber cloth, using a soft vacuum attachment, tightening accessible screws, and checking whether a shade has shifted from its brackets are reasonable first steps. Always follow the manufacturer’s care directions for the specific material, especially for fabric, woven wood, and cellular shades.
- Photograph the shade and mounting area before removing any part.
- Identify the shade style and operating system.
- Inspect for obvious obstructions, loose screws, or shifted brackets.
- Keep small parts away from children and pets.
- Test the shade gently several times after an adjustment.
Problems Best Left to a Qualified Professional
Some shade repairs involve tensioned springs, concealed mechanisms, electrical components, or overhead mounting points. These jobs can be difficult to diagnose safely without the right tools and replacement parts.
- Frayed or broken lift cords.
- Loose shades installed above beds, doors, or seating areas.
- Heavy treatments with damaged brackets or anchors.
- Motorized shades with battery, wiring, remote, or control concerns.
- Large shades that are difficult to remove and reinstall safely.
- Repairs involving clutches, springs, or hidden internal mechanisms.
Before arranging service, ask whether the technician has experience with the specific shade type, whether compatible parts are available, what the repair includes, and whether the operation will be tested after the work is complete.
How Window Shades Affect Comfort and Energy Use
Well-fitted shades can help manage glare and sunlight, which matters in rooms with strong afternoon exposure or large uncovered windows. Performance depends on the material, window direction, fit, season, and how consistently the shade is used. The U.S. Department of Energy notes that cellular window shade energy performance can support indoor comfort when shades are selected and used appropriately. In regions with cold northern winters or intense summer heat, proper shade maintenance becomes especially important for managing seasonal temperature swings and reducing heating and cooling costs.
That does not mean every aging shade should be replaced immediately. If the current treatment operates reliably and suits the room, a targeted repair may be the most sensible path. If it no longer controls glare, provides privacy, or stays in position, replacement can create an opportunity to choose a better fit for the window and local conditions.
A Practical Shade Maintenance Routine
- Dust monthly: Use a soft cloth, brush, or vacuum attachment.
- Inspect twice yearly: Check cords, brackets, slats, fabric, and controls.
- Clean carefully: Avoid excess moisture unless the manufacturer permits it.
- Operate gently: Pull straight and do not force a stuck treatment.
- Clear the area: Keep furniture, toys, and pet items away from operating parts.
Making the Final Choice
Use a simple three-step test: check safety first, assess the condition of the shade and hardware second, then compare the likely repair life with the benefits of replacement. A shade that looks dated may need only a minor adjustment, while one that appears fine may have worn internal parts. Looking beyond appearance helps homeowners make a safer, more practical decision.