The Yamaha Banshee 350 remains a rewarding machine for riders who enjoy maintenance, tuning, and purposeful upgrades. The longest parts list or the highest claimed horsepower number does not define the best builds. They are defined by a clear riding goal, a sound mechanical baseline, and components that work together. Before choosing pipes, carburetors, or engine modifications, decide how the ATV will be used. A trail setup needs predictable response and dependable cooling, while a dune or race-oriented setup may prioritize high-rpm pull and quicker clutch response. Start by identifying compatible Yamaha ATV Parts for the machine’s exact condition and purpose, rather than adding upgrades at random.
Why the Banshee Is a Strong Build Platform
The Banshee’s twin-cylinder two-stroke layout, manual transmission, and sport-ATV chassis give owners many tuning variables to work with. Its production history and original configuration help explain why it continues to attract hands-on builders. Still, usable power matters more than an impressive peak. A machine with clean throttle response and a powerband suited to the terrain is generally easier to ride quickly and safely. When planning repairs or upgrades, source Banshee Parts according to the machine’s year, existing setup, and intended use. Confirm fitment before ordering, especially when the ATV has modified carburetors, electrical components, intake parts, or drivetrain pieces.
Start With a Baseline Inspection
Older ATVs often need restoration before performance work. Fresh parts cannot compensate for an air leak, weak compression, a contaminated carburetor, damaged wiring, or worn chassis bearings. Establish a baseline so later changes can be evaluated honestly.
Baseline Checks
- Check compression consistency between both cylinders.
- Inspect intake boots, reeds, clamps, and crankcase sealing for air leaks.
- Clean carburetors and confirm smooth throttle operation.
- Inspect coolant level, hoses, radiator condition, and cap sealing.
- Check transmission oil, clutch feel, chain condition, and sprocket wear.
- Inspect brake pads, fluid condition, wheel bearings, and axle play.
Balance Airflow, Fuel, and Exhaust
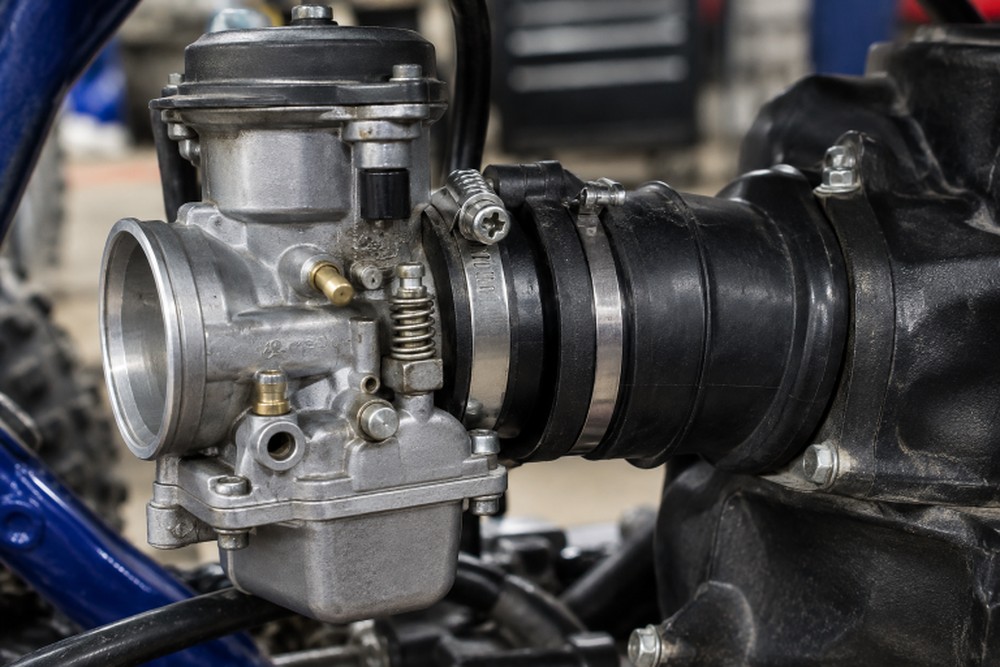
An air filter, intake arrangement, carburetor setting, and expansion chamber affect one another. Increasing airflow can require fuel-system adjustments, and exhaust leaks can make tuning results misleading. Install parts carefully, use fresh gaskets where needed, and confirm both intake paths seal correctly before attempting performance tests.
Set Carburetor Jetting Carefully
Jetting is central to both performance and engine durability. The pilot circuit influences low-throttle operation, the needle affects much of the midrange, and the main jet is especially important at large throttle openings. Temperature, elevation, humidity, fuel, intake changes, and exhaust changes can all alter what the engine needs.
A Disciplined Jetting Process
- Record the current jets, needle position, fuel, intake, exhaust, and weather.
- Confirm the carburetors are clean, synchronized, and supplied with fuel.
- Address low-throttle response first, then evaluate the midrange.
- Evaluate wide-open operation only under safe load conditions.
- Change one variable at a time and record the outcome.
A crisp sound in the garage is not proof of correct jetting under load. Stop riding if the engine shows signs of overheating, detonation, fuel starvation, or an unexplained loss of power. When results are unclear, consult an experienced two-stroke technician.
Choose Engine Work for Your Goal
A careful refresh can be a smarter investment than an aggressive engine combination. Restoring the sealing, compression, cooling, ignition, and fuel delivery conditions often produces a more dependable ATV before porting, displacement changes, or other major work is considered.
- Refresh build: Focus on pistons, seals, gaskets, cooling, and carburetor condition.
- Trail build: Favor smooth response, manageable gearing, and long service life.
- Dune build: Match high-rpm breathing with clutch tuning, cooling, and traction.
- Race-focused build: Requires carefully matched engine work, fuel, exhaust, gearing, and maintenance.
For internal engine work, follow the applicable service information for clearances, torque values, ring placement, piston orientation, and break-in procedures. Precision during assembly is more valuable than rushing to finish the build.
Use Gearing to Change the Riding Feel
Final-drive gearing changes acceleration, cruising behavior, engine load, and how easily the ATV stays in its useful power range. Shorter gearing can improve low-speed response, while taller gearing may better suit open terrain if the engine has enough power to pull it. Larger tires also change effective gearing, so consider tire choice before selecting sprockets.
Improve Control Before Adding More Power
More power is only useful when the chassis can apply it. Inspect tires, steering joints, wheel bearings, brakes, suspension movement, chain alignment, and all major fasteners. Set the tire pressure for the surface, make sure the ATV tracks straight under braking, and replace any damaged or worn safety-critical components before riding in demanding conditions.
Test Changes Consistently
Seat-of-the-pants impressions can be helpful, but they are more reliable when the test conditions remain similar. Use the same test area, fuel, tire pressure, rider position, and warm-up routine whenever practical. Record throttle response, temperature behavior, plug condition, and any change in sound or vibration.
Avoid Common Build Mistakes
- Installing several upgrades at once and losing track of what changed.
- Copying another rider’s jetting without accounting for local conditions.
- Adding large carburetors without matching the rest of the engine.
- Ignoring suspected air leaks because the engine still starts and idles.
- Sending added power through worn brakes, tires, chains, or bearings.
- Choosing maximum output over response, reliability, and rider control.
Build in Stages for Better Results
Begin with inspection and repair. Next, restore the fuel system, cooling, ignition, brakes, and suspension. Then match intake and exhaust changes with careful jetting, select gearing for the primary riding area, and add internal engine work only when the foundation is proven. A balanced Banshee build is faster to troubleshoot, easier to ride, and more likely to deliver dependable fun between outings.
Conclusion
Building a Yamaha Banshee 350 for better performance starts with a healthy engine and a clear understanding of how the ATV will be used. Rather than installing upgrades at random, focus on matching the intake, exhaust, fuel delivery, gearing, tires, brakes, and suspension to your riding goals. Make changes in stages, verify jetting carefully, and document the results to identify what actually improves performance. Before purchasing parts, check compatibility with your Banshee’s year and current setup, and address worn or damaged components first. A balanced build prioritizes reliable operation, predictable handling, and rider control, not just peak horsepower. With careful planning and consistent maintenance, you can create a Banshee that better suits your terrain and delivers a more rewarding riding experience.